Plugin bloat is one of the most common and costly problems affecting WordPress websites. It’s easy for a plugin library to grow unchecked — you install a plugin to solve an immediate problem, forget to remove temporary testing plugins, or add tools recommended by blog posts without critically evaluating whether you actually need them. Over time, this accumulation of plugins degrades your site’s performance, increases security risks, and makes maintenance more complex.
In this guide, we’ll walk through a systematic approach to minimizing plugin excess on your WordPress site — identifying redundancy, prioritizing essential functionality, and establishing habits that keep your plugin stack lean over the long term.
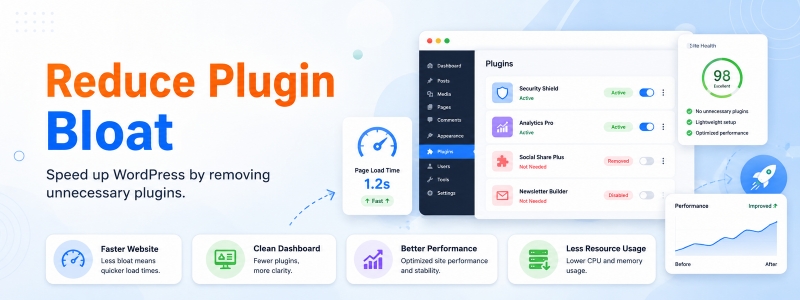
Why Plugin Excess Is Harmful
Every plugin you install adds code that must be loaded on each page request. Even deactivated plugins take up server space and can pose security risks if they contain unpatched vulnerabilities. Active plugins add database queries, PHP execution time, and potentially JavaScript and CSS files to every page load. A WordPress site with 40 active plugins will almost always perform worse than a comparable site with 15 well-chosen plugins — not because more functionality inherently means worse performance, but because each additional plugin has a performance cost that compounds across your entire site.
Plugin conflicts become more likely as your library grows. The more plugins you run, the higher the probability of two plugins trying to modify the same WordPress hook or output competing JavaScript libraries — leading to subtle bugs that can be difficult to diagnose.
Step 1: Conduct a Full Plugin Audit
Start by going to Plugins → Installed Plugins and making a complete list of every plugin on your site, both active and inactive. For each plugin, write down what function it performs, when you last actively needed that function, and whether any other plugin or your theme already provides the same or similar functionality. This audit often reveals surprising levels of duplication — multiple SEO plugins, multiple caching solutions, or multiple social sharing tools running simultaneously.
Step 2: Identify and Remove True Duplicates
Plugin duplication is more common than most site owners realize. Check specifically for multiple plugins serving the same function: more than one caching plugin, more than one SEO plugin, more than one backup solution, more than one contact form plugin, or more than one social media sharing tool. Choose the best single solution for each function and remove the redundant alternatives. Having two caching plugins active simultaneously, for example, is not just unnecessary — it can actively break your site’s caching functionality.
Step 3: Evaluate Each Remaining Plugin Critically
For every plugin that remains after removing true duplicates, ask these questions: Is this plugin actively providing value that I can verify? When did I last use the functionality this plugin provides? Could this functionality be handled by a plugin I’m already using, or by native WordPress/WooCommerce features? Is this plugin maintained with recent updates? If a plugin fails any of these tests, it’s a candidate for removal.
Step 4: Replace Multi-Purpose Plugins with Focused Alternatives
Some site owners use massive “do-everything” plugins that combine SEO, social sharing, performance optimization, and security into a single tool — ostensibly to reduce the total plugin count. In practice, these bundled solutions often perform each individual function less well than dedicated tools, and they create enormous dependency on a single plugin. Consider whether replacing a bloated all-in-one plugin with a small number of focused, high-quality plugins might reduce your total functionality footprint while actually improving performance.
Step 5: Check Whether Theme Features Can Replace Plugins
Many premium WordPress themes include built-in functionality that replicates what separate plugins provide — slider functionality, custom post types, portfolio displays, mega menus, or basic SEO features. If your theme already includes these features, there’s no need for a separate plugin. Relying on theme-native features reduces your plugin count and often results in better design integration than a generic plugin’s output.
Step 6: Establish a Plugin Evaluation Process
Preventing future plugin bloat requires developing a discipline around plugin installation. Before installing any new plugin, run through a brief evaluation: Do I genuinely need this functionality? Is there a native WordPress or WooCommerce solution I haven’t considered? Have I checked whether any existing plugin already provides this? Have I read recent reviews and verified the plugin is actively maintained? Could this be implemented with a small code snippet instead? This friction in the installation decision process dramatically reduces unnecessary plugin accumulation over time.
Step 7: Remove Unused Plugins Immediately After Testing
One of the most common sources of plugin accumulation is test plugins — plugins installed to evaluate for a specific purpose and then forgotten. Establish a personal rule: if a plugin isn’t going into active use within 48 hours of testing, it gets deleted immediately. Don’t leave deactivated test plugins sitting in your WordPress installation indefinitely “just in case” — they accumulate over time and create maintenance overhead without delivering any value.
Conclusion
Maintaining a lean, efficient plugin stack is an ongoing discipline rather than a one-time cleanup project. By regularly auditing your installed plugins, removing true redundancy, critically evaluating each plugin’s ongoing value, and establishing disciplined habits around new plugin installations, you keep your WordPress site performing at its best while reducing security risks and maintenance complexity. A smaller, well-curated plugin library is almost always better than a larger, uncurated one.